6 — Creating & Running a Community
Anyone can create a community and instantly becomes its community admin (scoped to that community only). This section covers the full create flow and the admin tools that unlock.
6.1 Creating a community
From the dashboard's My Communities → Create (or the new‑user Create a community), you reach the create form:
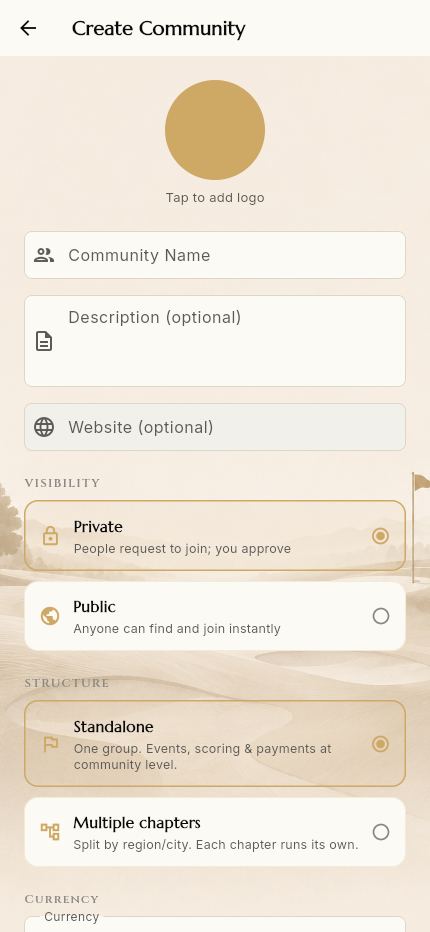
| Field | Notes |
|---|---|
| Logo | Tap to add a community logo |
| Community Name | Required |
| Description | Optional |
| Website | Optional |
| Visibility | Private (people request to join; you approve) or Public (anyone joins instantly) |
| Structure | Standalone (one group; events, scoring & payments at community level) or Multiple chapters (split by region/city; each chapter runs its own) |
| Currency | e.g. CAD, GBP, MYR, INR, LKR |
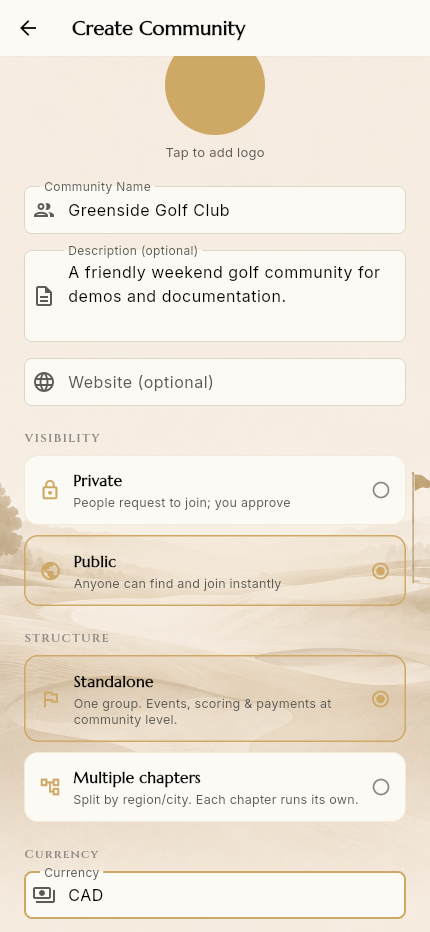
Tap Create Community. You're returned to the dashboard, now listed as the admin of your new community.
Structure is a one‑time fundamental choice. Standalone keeps everything at the community level; multi‑chapter makes each chapter the operating unit (its own admins, finances, payment link, currency, timezone). A standalone community can later add chapters (§6.6).
6.2 The admin community home

Entering your community looks like the member shell, with one extra control on the home screen: Add Chapter.
The real admin power lives in the Community tab, which now shows three admin entries above the section grid:
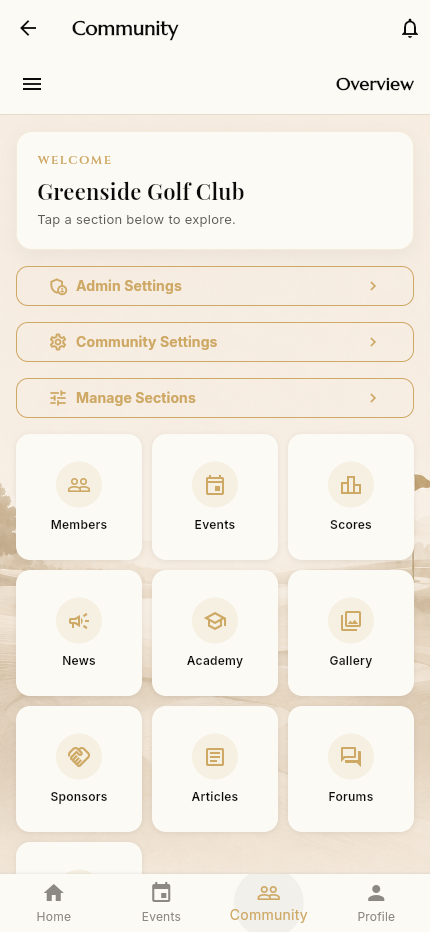
- Admin Settings — the admin dashboard (§6.3)
- Community Settings — identity, currency, payment link, About (§6.4)
- Manage Sections — turn features on/off (§6.5)
6.3 Admin Dashboard (Admin Settings)
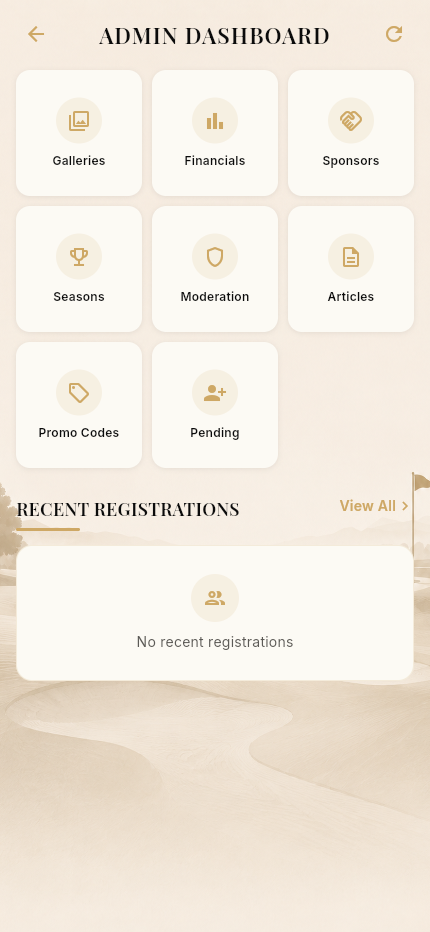
A control center with tiles for:
- Galleries — manage community photos
- Financials — revenue report (below)
- Sponsors — manage sponsors
- Seasons — create/manage competition seasons
- Moderation — moderate member‑generated content
- Articles — manage long‑form articles
- Promo Codes — create discount codes for events
- Pending — pending join requests / approvals
- Recent Registrations — latest event sign‑ups
Financials
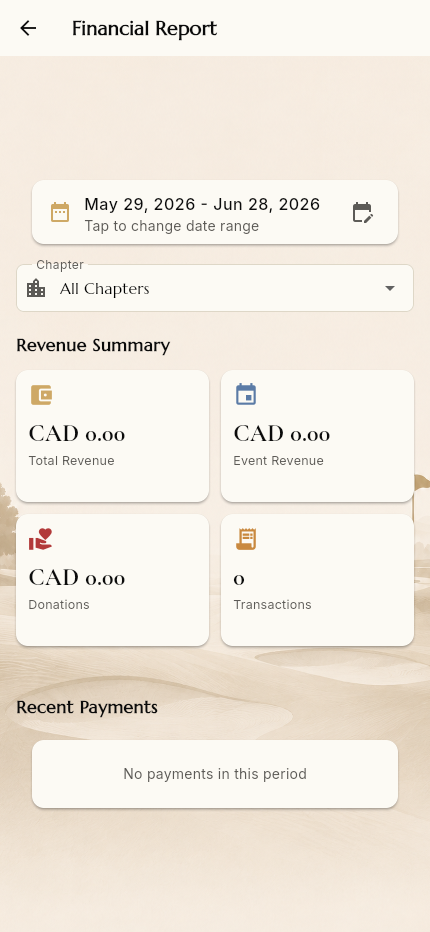
A Financial Report with a date‑range picker, chapter filter, and a revenue summary — Total Revenue, Event Revenue, Donations, Transactions in the community's currency — plus a Recent Payments list. (Because payments are reconciled manually, figures reflect what admins have marked paid.)
Seasons

Manage seasons — create the seasons that drive Season Standings. Add a season with the + button.
Promo Codes

Manage Promo Codes — create discount codes (empty by default).
6.4 Community Settings
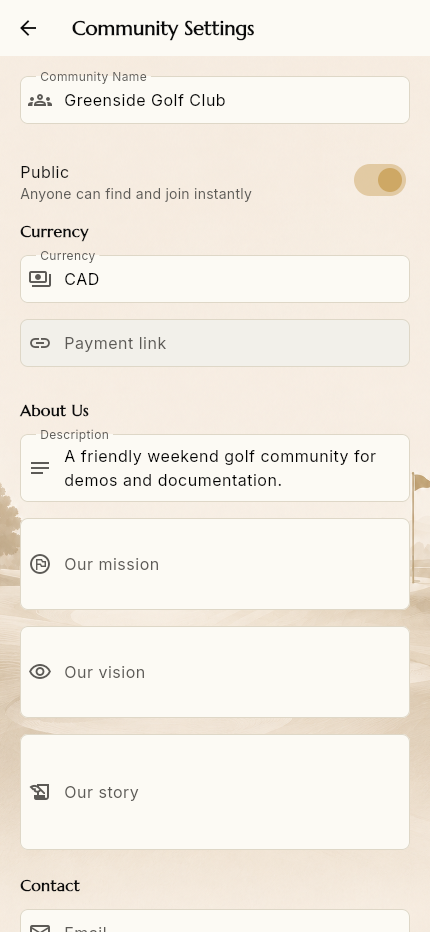
Edit your community's identity and money settings:
- Community Name and Public toggle
- Currency
- Payment link — the external checkout URL (Stripe, Golf Genius, any
gateway) that members are sent to when paying for events
- About Us — Description, Our mission, Our vision, Our story
- Contact — Email, Phone, Address, Website
Scroll to the bottom and tap Save Changes:

For multi‑chapter communities, currency and payment link are set per chapter instead (each chapter is financially independent).
6.5 Manage Sections
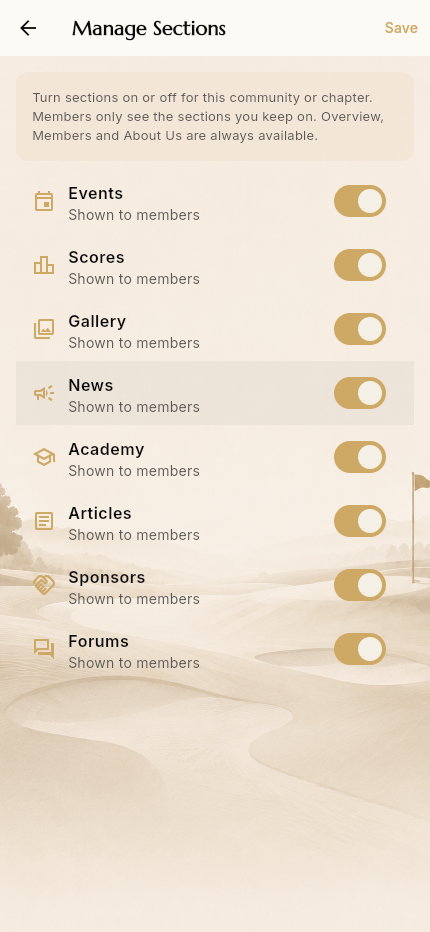
Toggle which sections members see for this community/chapter: Events, Scores, Gallery, News, Academy, Articles, Sponsors, Forums. Overview, Members and About Us are always available. This is how the config‑driven feature set is tailored per community without any code change. Tap Save.
6.6 Creating & managing events (admin)
The community admin runs the full event lifecycle.
Create an event
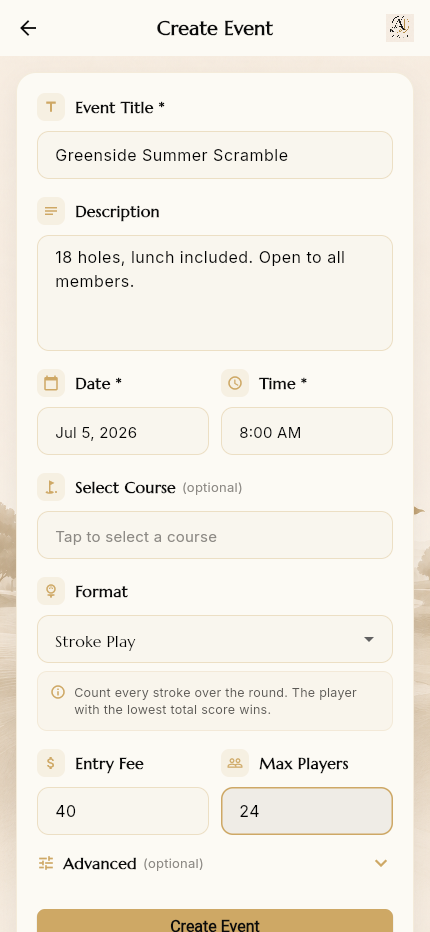
From the Events tab, the + button opens the create form:

Fields: Event Title, Description, Date & Time, Select Course (optional), Format (Stroke Play, etc.), Entry Fee, Max Players, and an Advanced section (detailed description, format details, intro video URL, and Status).
New events start as drafts
After tapping Create Event, the event is saved as a Draft. Drafts are not shown on the member-facing Events tabs yet — you publish them from Manage events:
To find and publish the draft, go to Community → Events → Manage events (the Manage events button appears in the community's Events section):
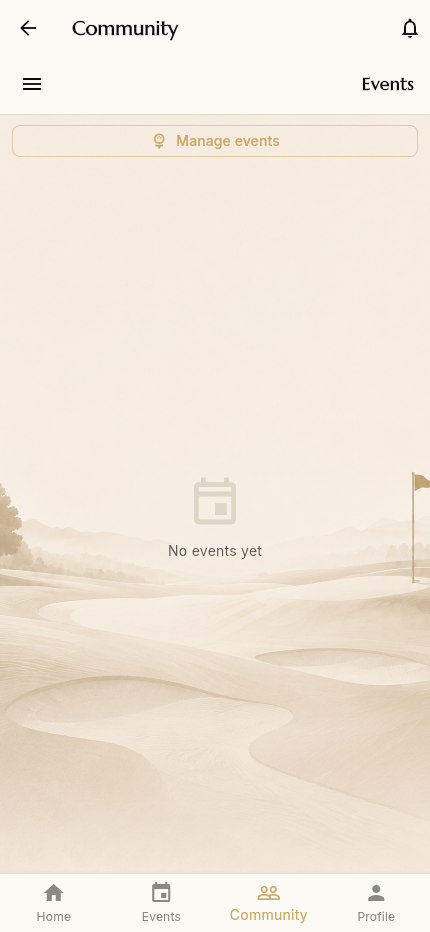
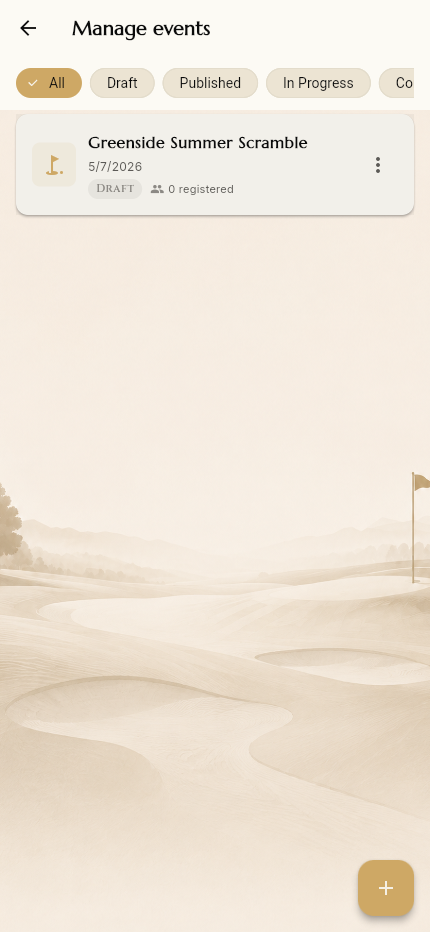
The Manage events screen lists all events with status filters (All, Draft, Published, In Progress, Completed) and a per‑event ⋮ menu:
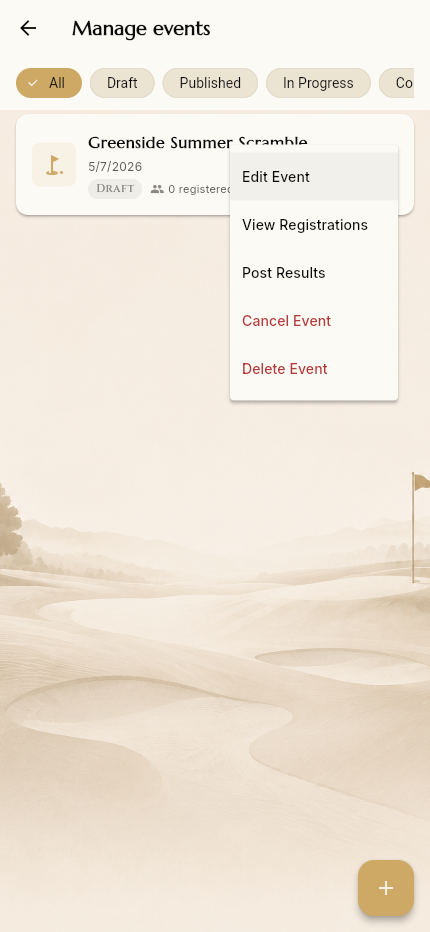
- Edit Event, View Registrations, Post Results (opens scoring /
results), Cancel Event, Delete Event
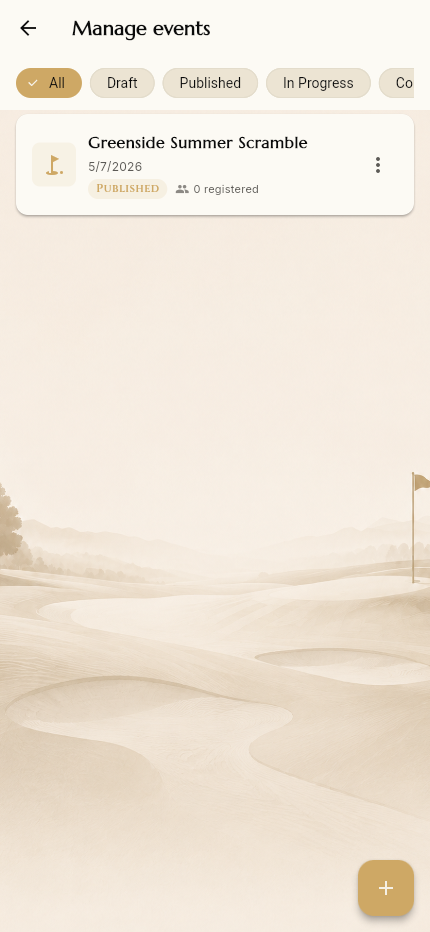
Publishing a draft
To publish a draft, open Edit Event → Advanced → Status, switch it to Published, and tap Update Event:

Once published, the event appears to members and a "New Event" notification is sent:
6.7 Adding a chapter
The Add Chapter button (admin home) opens:
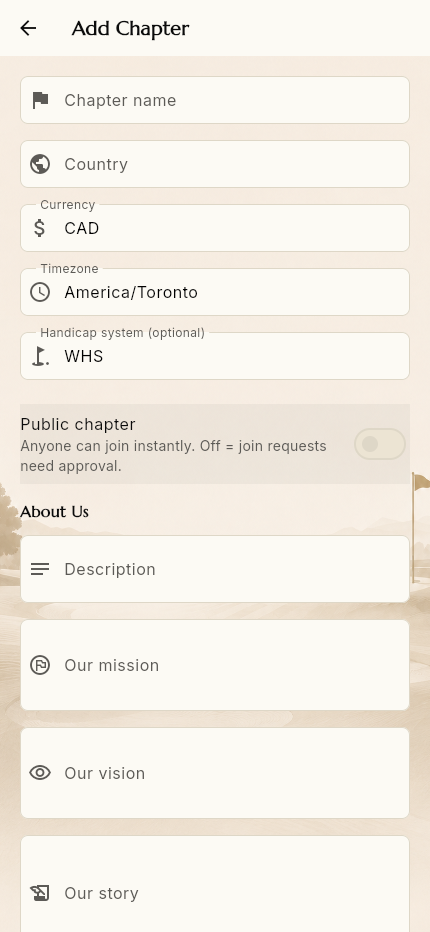
Each chapter has its own: name, country, currency, timezone, handicap system, public/private join policy, About content, and contact details — reflecting that a chapter is an independent operating unit.
➡️ Next: Settings & Account